

Microsoft Project is used by many project managers, especially at large organizations where it’s legacy software. But MS Project can be difficult to use. So, how do you use Microsoft Project? Our guide goes through a step-by-step process to help you maneuver through the byzantine program.
See if Microsoft Project is right for you. If not, it might be time to explore a Microsoft Project alternative.
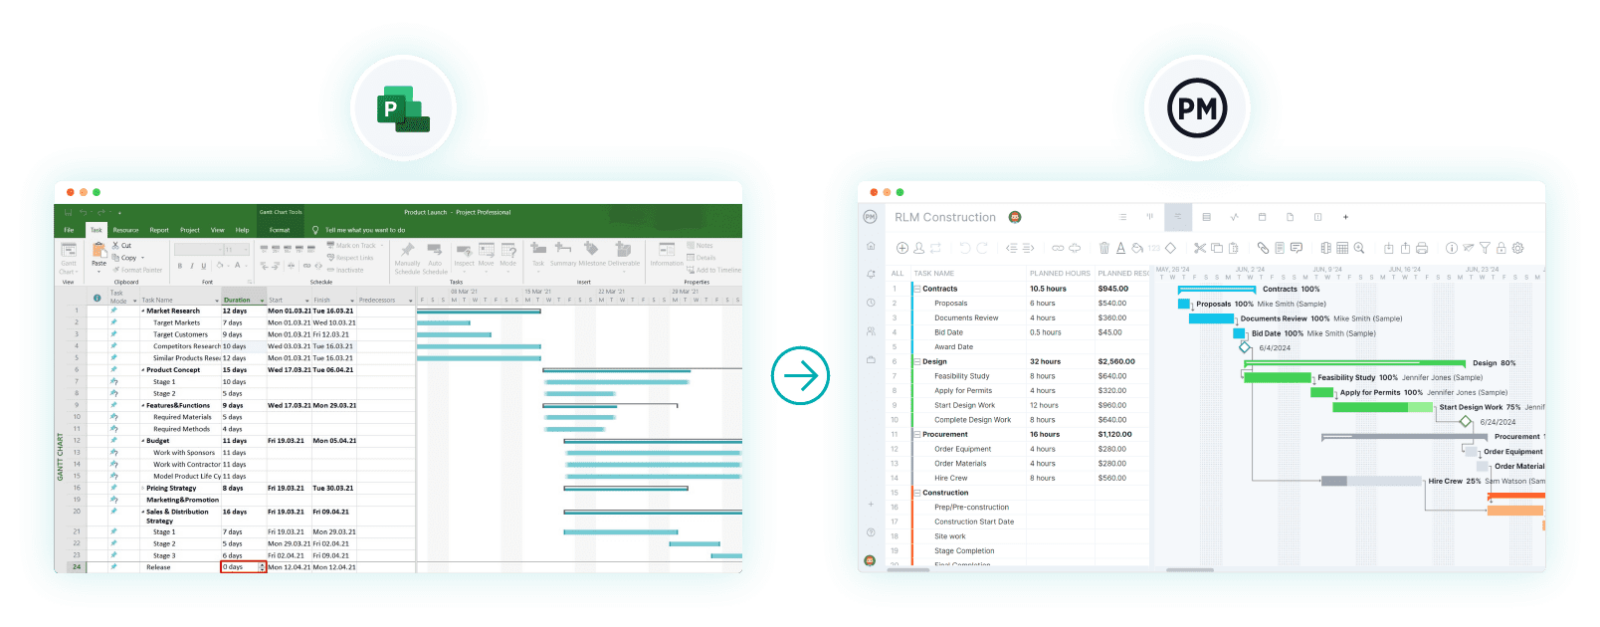
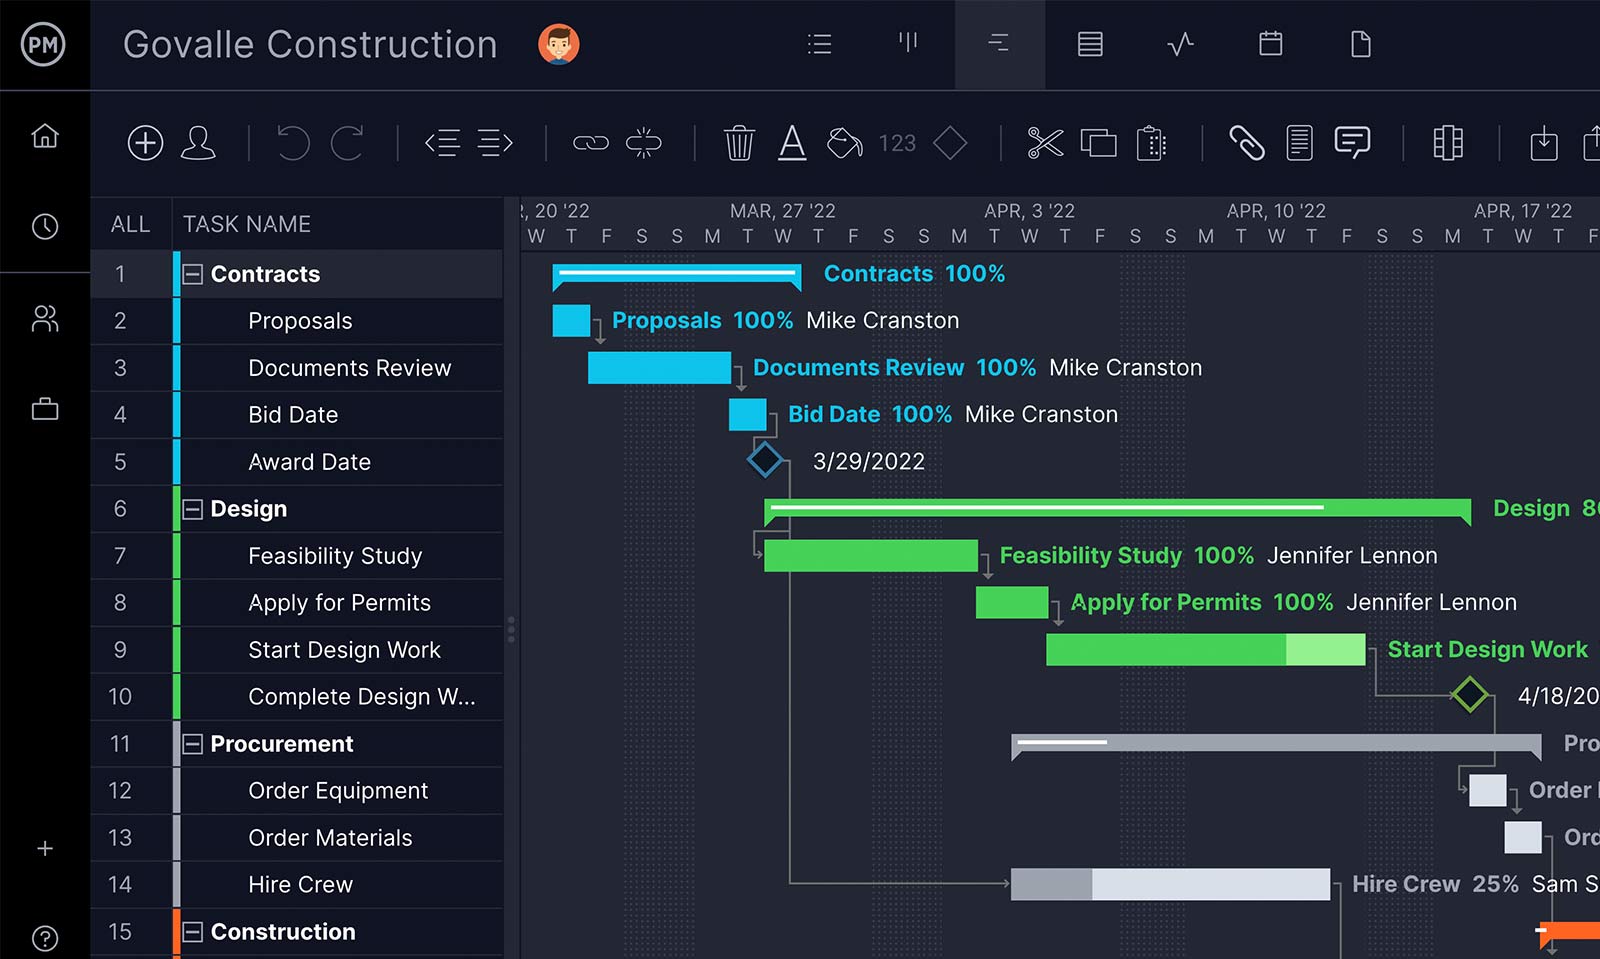
ProjectManager, for instance, is a Microsoft Project alternative that offers nearly all the same features as Project in a modern, easy-to-use platform. Collaborate with your team using Gantt charts, kanban boards, dashboards, roadmaps and more. You can even manage and track your resources in real time: Project can’t do that. Start today for free.
What Is Microsoft Project?
Microsoft Project is a powerful project management software from that helps users plan, schedule and oversee tasks, resources and deadlines. It supports defining dependencies, assigning work, tracking progress and managing budgets all in one place. The tool offers multiple visual layouts—such as grids, timelines and boards—to present project data in the way that suits your style. Built-in reports, alerts and integrations with other Microsoft apps help teams stay coordinated and informed.
While capable, Microsoft Project is also known for being complex and expensive compared to most project management software. For example, Project Standard 2024 is priced at $679.99 as a one-time license, while Project Professional 2024 retails for $1,129.99. The learning curve can be steep for new users, and advanced features often demand careful configuration or additional training to use effectively.
How to Use Microsoft Project
The first step to learning Microsoft Project is understanding its different views, which form the foundation of how the software organizes project data. Each view presents information in a unique way, whether you prefer spreadsheets, timelines, boards, diagrams or calendars. By identifying which view best fits your workflow, you can begin planning, scheduling and tracking tasks more effectively. Familiarity with these views helps you navigate the tool with confidence and tailor it to your project’s specific needs.
- Grid View: Provides a table-based workspace that resembles a spreadsheet, letting you organize tasks with start and end dates, durations and dependencies. You can also sort, group and filter information for easier project management.
- Board View: Displays tasks on a kanban-style board so you can manage progress visually. This style of workflow tracking was emphasized in Project for the Web; in desktop versions of Microsoft Project, similar functionality may require adjustments or third-party add-ons.
- Timeline View: Offers a Gantt chart layout to map tasks across a project schedule. With Microsoft Project Standard 2024 and Project Professional 2024, you can add multiple timeline bars, trace task paths and highlight the critical path.
- Network Diagram View: Shows tasks and their connections in a flowchart-like diagram, making it easier to see dependencies and overall structure at a glance.
- Calendar View: Lays out tasks in a familiar monthly or weekly calendar format, making it useful for projects with time-sensitive deadlines.
However, it must be noted that the functionality of these views vary depending on the subscription of Microsoft Project. Project Standard 2024 users will not be able to access all the features included in the Project Professional 2024 edition.
1. Enter Project Information in the Grid View
The grid view in Microsoft Project provides a spreadsheet-like interface where you can begin building your project plan. This view is designed to capture essential details in a structured format, making it easier to organize and update information as your project develops. By entering data directly into the grid, users can quickly establish a foundation for scheduling, resource allocation and progress tracking.
The grid view serves as the starting point for most projects, ensuring that all critical components are documented before moving into more advanced planning features. Here are some of the key project details that can be visualized with Microsoft Project’s grid view.
- Task names: Define each activity that needs to be completed.
- Start and finish dates: Record when tasks are scheduled to begin and end.
- Durations: Specify the length of time each task should take.
- Dependencies: Link related tasks to establish a logical sequence.
- Resources: Assign team members or materials required for completion.
2. Manage Tasks and Workflows with the Board View
The board view in Microsoft Project gives users a kanban-style workspace to manage tasks and workflows visually. This view organizes work into columns that represent different stages of progress, making it easier to track what’s pending, in progress or completed. By dragging and dropping cards between columns, teams can quickly adapt to changes and keep everyone aligned. The board view is especially helpful for agile or iterative projects where continuous updates and clear visibility into task status are critical for maintaining momentum. Here are some of the key project details that can be visualized with Microsoft Project’s board view and kanban cards.
- Task title: A clear label describing the activity.
- Assigned resource: The team member responsible for the task.
- Status: The current stage of the task within the workflow.
- Due date: The deadline by which the task should be completed.
- Notes or details: Additional context, instructions or links.
3. Create Project Schedules with the Timeline View
The timeline view in Microsoft Project, often represented as a Gantt chart, is the primary tool for scheduling tasks across a project’s duration. By placing activities on a timeline, users can see how work is distributed, monitor overlapping tasks and ensure deadlines are realistic. This view provides a clear roadmap of what needs to be accomplished and when. It also highlights critical path tasks, helping teams prioritize work that directly impacts project completion. The timeline view is ideal for planning, tracking and communicating schedules to stakeholders. Here are some of its key features.
- Task dependencies: Define relationships between tasks to ensure proper sequencing.
- Critical path: The critical path of a project identifies tasks that determine the overall project duration.
- Milestones: Mark important achievements or deadlines in the schedule.
- Multiple bars: Display parallel timelines for different workstreams.
- Task path highlighting: Visualize how one task impacts others in the schedule.
4. Visualize Task Sequences with the Network Diagram View
The network diagram view in Microsoft Project shows tasks and their relationships in a flowchart-like format, making it easier to understand how project activities connect. Each task is displayed as a node with arrows indicating dependencies, allowing users to trace the logical order of work. This view is especially useful for complex projects where multiple paths and sequences overlap. By visualizing the workflow, project managers can detect bottlenecks, adjust priorities and ensure that task order supports overall project goals. Here are some of the key project details that can be visualized with Microsoft Project’s network diagram view.
- Task nodes: Display each activity as a box in the diagram.
- Dependency arrows: Show the dependencies and order between tasks.
- Critical path visualization: Highlight the sequence of tasks that drive project duration.
- Slack time display: Indicate tasks with flexibility in their start or finish.
- Flowchart layout: Provide a graphical view of task sequencing for clarity.
5. Review Project Timelines with the Calendar View
The calendar view in Microsoft Project displays tasks across a monthly or weekly calendar, providing a familiar format for monitoring project timelines. This view is especially valuable when managing multiple projects or programs, as it allows users to see overlapping schedules and deadlines at a glance. By presenting activities in a date-driven layout, project managers can quickly identify potential conflicts, allocate resources more effectively and ensure key milestones are visible. The calendar view helps teams coordinate workloads and maintain alignment across larger project portfolios.
6. Share Microsoft Project Files
Learning how to use Microsoft Project is a project in itself. It’s a huge program and like turning a tanker ship, you have to have patience and give it time. If you invest some, you’ll get a nice project management tool to help you manage your projects. However, when it comes to sharing files with your team, you may find yourself frustrated with no easy solution other than buying more MS Project licenses. This is because Microsoft Project Files (MPP files) can’t really be edited in other software other than the two desktop versions of Microsoft Project, Project Standard 2024 and Project Professional 2024, which are very expensive as previously mentioned.
There are, of course, workarounds for those of us who don’t have a Microsoft Project license but still need to work with and share MPP files. Most common is the plethora of MS Project viewers available online. These allow you to view files, but most don’t give you the ability to work on them. If you want a project management software with robust project management views like Microsoft Project that allows you to open, edit and export MPP files, try ProjectManager.
Open, Edit and Export Microsoft Project Files with ProjectManager
ProjectManager is the exception because our online project management tool can import MPP files and then give you all the features you need to edit the file, offering even more options than Microsoft Project. This makes us an excellent alternative to Microsoft Project, or at least a software to use in tandem with MS Project.
MS Project isn’t easy to share online. Its files are too big and cumbersome. But it’s easy to do with ProjectManager’s integration with Microsoft Project. There are multiple features in ProjectManager that not only allow you to view and share MPP files but there’s also roundtripping, which maintains your changes and format from one program to the other.
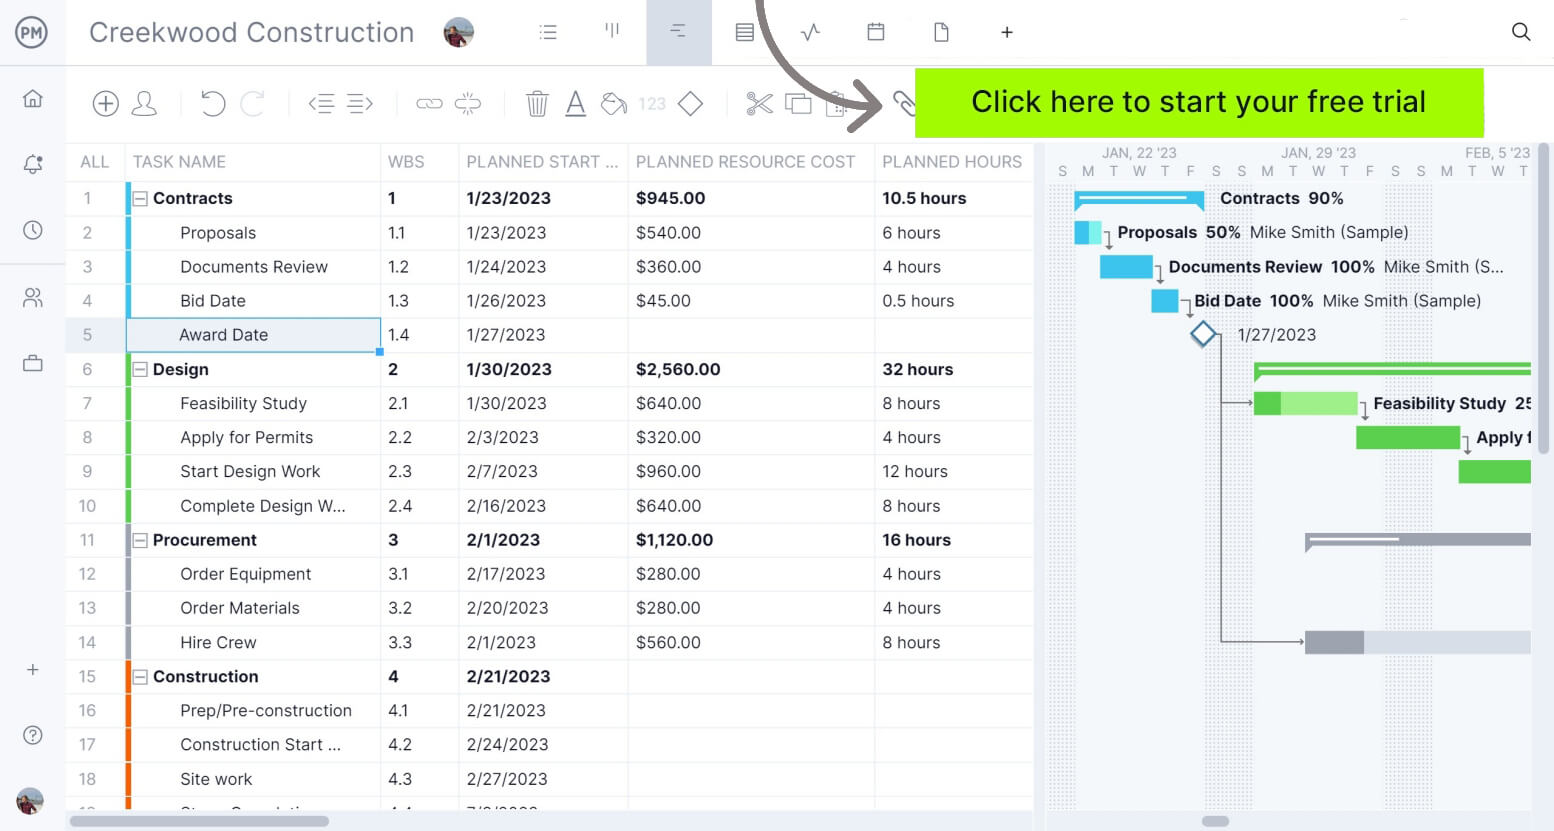
In terms of features, we have award-winning Gantt charts that function just like MS Project, and a real-time dashboard that gives you an accurate and timely window into the progress of the project. There’s also a timesheet and workload management to help you track time right alongside the project. And we offer online PM tools that foster collaboration with your team.
If you just need access to MPP files, then you should take a look at ProjectManager. As noted above, it’s more than just a tool to view your MS Project online, but gives you access to work on the files and save them without losing any of your work.
How to Import Your Microsoft Project Plan into ProjectManager
Now that you understand the basics, it’s time to see how seamlessly ProjectManager works with MS Project and how as a standalone tool we’re a one-stop-shop for all your project management needs. Here’s a quick tutorial on getting your MPP file into our software.
Sign up for a free trial and follow the steps to get your Microsoft Project files into an online, collaborative tool.
Start the Process
Get started by selecting the Gantt project view. There you’ll see an import button that looks like a box with an arrow through it. Just click it.
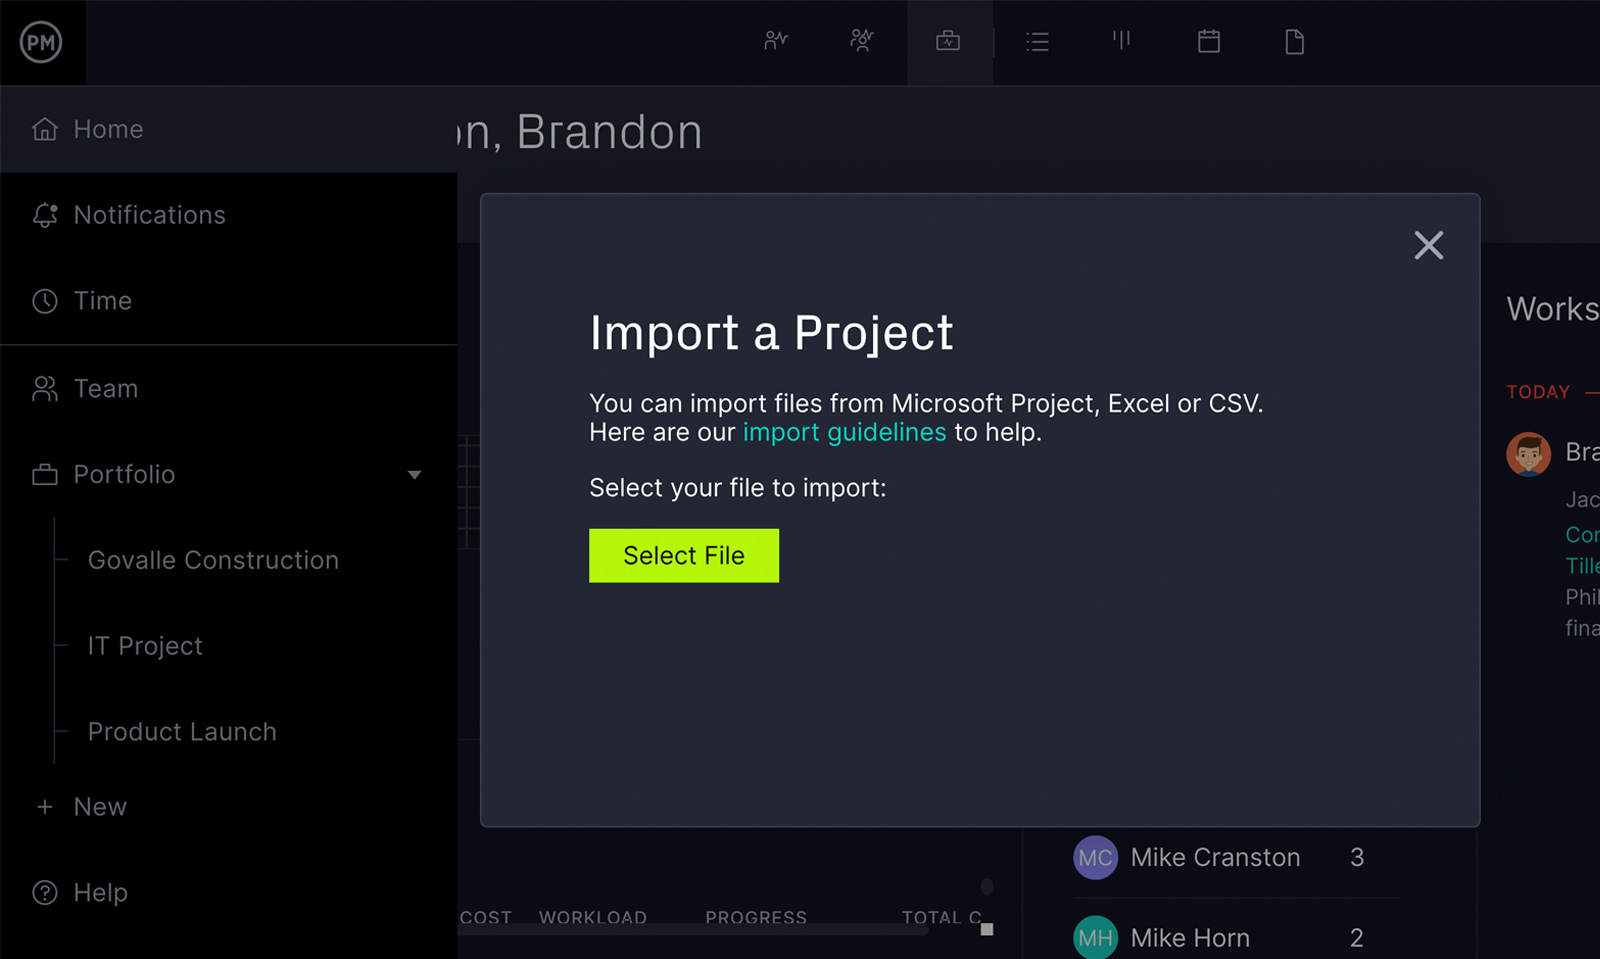
Which File Do You Want to Import?
See the popup window? It wants to know the file you’d like to import. Choose it and then click Next.
Pick File Options
Find the import options on the new popup window, such as whether you’d like to import the MPP file to a new project or an existing one. Then decide whether to keep or replace the data.
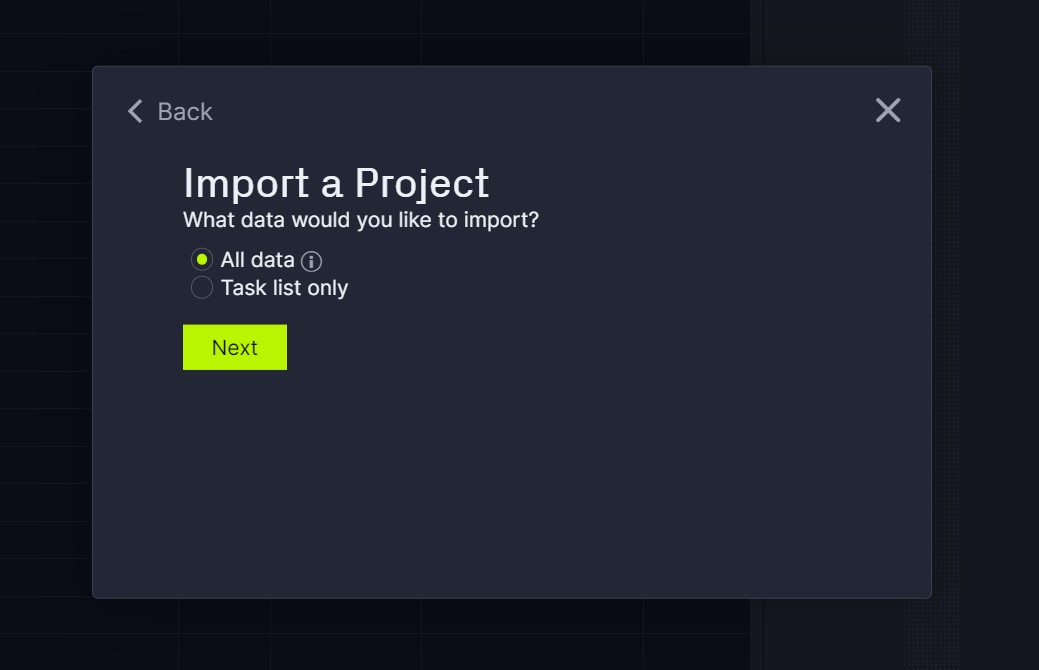
Do You Want Everything or Just the Task List?
Next, decide if you want to import all the data or just the tasks. Once you’ve selected that, click next.
Start Working!
Begin sharing and editing your MPP file. You’ll notice we keep your customization, and when you export it, any changes will carry with the file back to MS Project.
Whether you use Microsoft Project or not, ProjectManager is a great workaround for that bulky program, especially if you need Microsoft Project for Mac. We’re leaner and online, so you can share easily. ProjectManager is also a great alternative to MS Project, offering nearly the same features, but is more user-friendly, sharable and without the excessive cost and learning curve. See for yourself by taking this free 30-day trial.
Related Content